Kathy's Desk Plan

Build a Computer Desk, in One Weekend, with One Sheet of Plywood, For Under $100.00

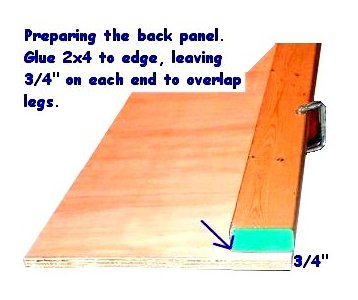
Assemble and attach the back panel

While the glue on the legs sets, measure for the back panel. It should overlap the edges of the legs, & it should be approximately 41" long. Cut one of the 48"x15" pieces of plywood to the correct length.

Then cut a 2x4 piece 1 1/2" shorter than the back panel, and attach it to the panel with glue. My 2x4 & plywood didn't seem to like each other, so I had to clamp them together & force them to accept the glue. Leave 3/4" open at each end. When the glue was set, I put two 1 5/8" screws through the plywood & into the 2x4 near the ends. Next I attached the back panel. Because I wanted an open slot for wires & such, I attached the back panel a little lower than the desktop. The 2x4 on the back panel should fit into the spot left open on the legs. To keep the back slot open during assembly, I temporarily put pieces of 2x4 under the back panel as a spacer. The back panel needs to overlap the legs, working from the back, put 1 5/8" screws through the back panel & into the legs, one at the top & one at the bottom on each side. Put 2" screws through the back panel & through the 2x4, & into the 2x4 attached to the leg.

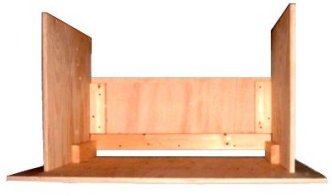
Then come around to the front, take out the 2x4's used as spacers, & glue & screw them into the corners between the back panel & the legs. This is what it looks like with the back panel attached, leaving a space for wires, and with the 2x4's attached to both the back panel and the legs. I haven't turned it right side up yet.

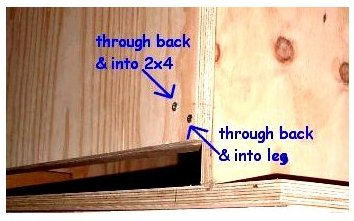
From the back, while the desk is still upsidedown, put a screw through the back panel into the legs, and put another screw into the 2x4 brace.

""
""

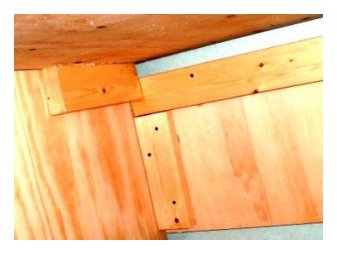
Closeup view of the inside corner, a right side up view.

Now you can turn it rightside up ""

Email me | View my Guestbook | Sign my Guestbook | SiteMap | Privacy Policy | Home
Copyright © 2006 - 2009 ComputerDeskAssembly.com

""